Cactus Root Rot: How to Spot It and What to Try
What root rot is, the conditions that lead to it, how to confirm it by looking at the roots and stem base, the rescue steps growers commonly try, and when a plant is unlikely to recover.
Few things worry a grower more than a cactus that turns soft at the base. Cactus root rot is the usual fear, and a reasonable one: it is among the most common ways potted cacti are lost, and by the time anything shows above the soil it has often been under way for a while.
It is not always the end. A plant that still has firm, clean tissue can sometimes be trimmed, dried and started again in fresh mix. What follows covers what rot is, how to confirm it instead of guessing, what growers commonly try, and where the honest limits lie.
What root rot actually is
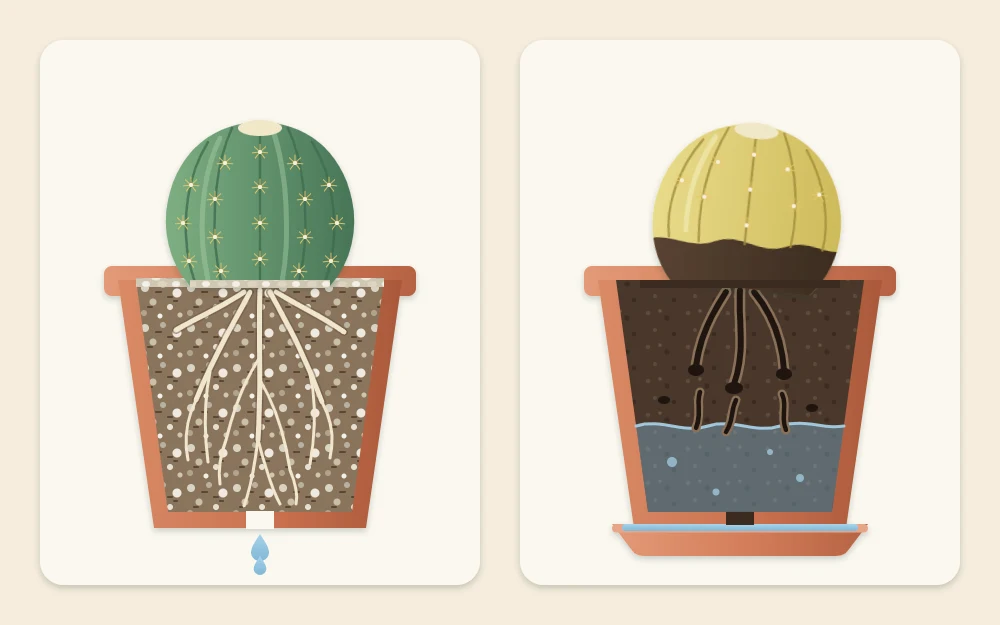
Roots need air as well as water. In a mix that stays wet, the gaps between the particles stay full of water, the roots run short of oxygen, and they begin to die. Fungi and bacteria that are present in most potting mixes then take hold in the dead and weakened roots, and the decay can move from the roots into the base of the stem.
So rot is less an infection that arrives from nowhere than the result of conditions: a wet, airless mix for too long. Desert cacti are especially vulnerable because their roots are adapted to ground that drains and dries quickly.
The conditions behind it
Rot rarely has a single cause. Several of these usually combine:
- Watering again before the mix has dried all the way through.
- Dense, peat-heavy soil that holds water around the roots.
- A pot with no drainage hole, or one left standing in a full saucer or outer pot.
- A pot much larger than the root ball, so a large volume of mix stays wet.
- Low light and cool temperatures, when the plant uses very little water.
- Watering through the winter rest as if it were summer.
Clemson Cooperative Extension’s indoor cacti factsheet describes too much water as the most common problem with these plants and advises that pots should never stand in water. If you are unsure whether your pot and mix let water escape, the guide to how cactus drainage works goes through each part.
Signs above the soil, and why they are not proof
The changes people notice first are commonly associated with rot, but none of them confirms it:
- The body turns pale or yellowish and loses its firm look.
- A soft, dark or translucent patch appears near the soil line.
- The plant leans or wobbles in its pot.
- It stays shriveled even after a thorough watering.
- The mix smells sour and never seems to dry.
Each has other explanations. Shriveling is often simple thirst. Soft, darkened tissue can follow a cold night. Brown skin at the base of an older plant may be corking, which is firm, dry and normal. A plant with dead roots can also look thirsty, because it can no longer take up water, and watering it more makes matters worse. For the wider picture, compare what you see with the usual signs of an overwatered cactus.
How to confirm it
The only reliable check is to look. Let the mix dry as far as it will, then slide the plant out of its pot and examine the roots and the base of the stem. The guide to inspecting cactus roots shows how to do this with the least disturbance.
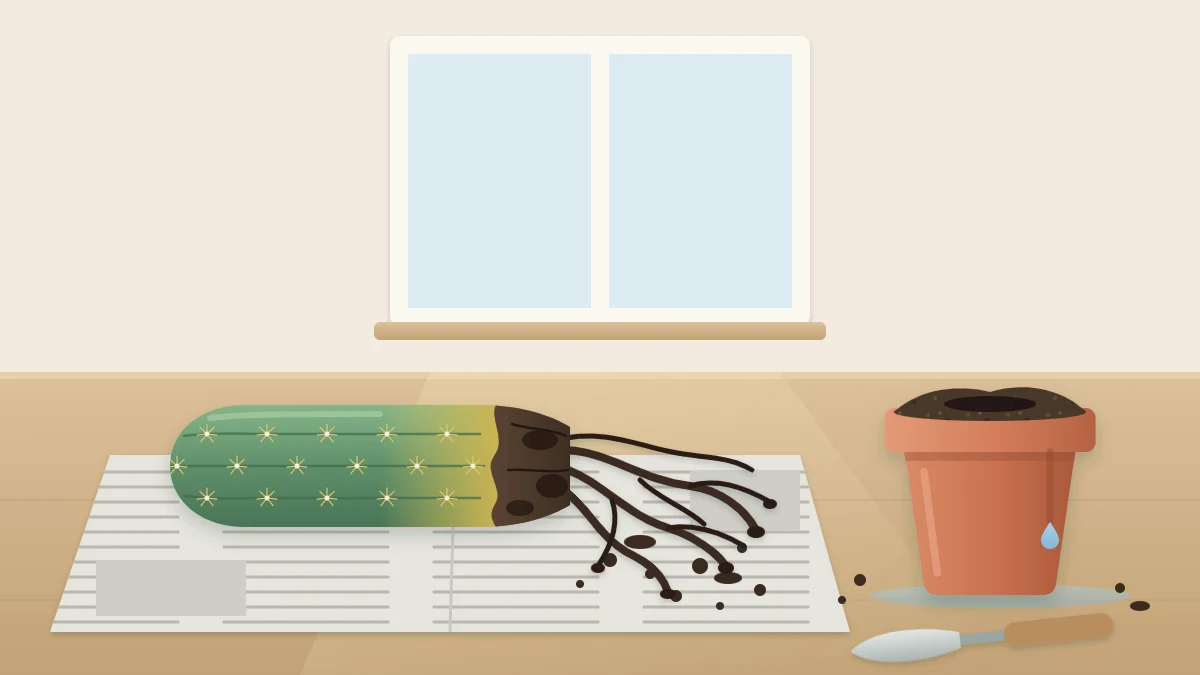
Healthy roots are firm and pale or tan, with fine branches. Rotted roots are dark, limp and soft. Their outer layer often slips off when touched, leaving a thin thread, and they may smell sour. Then check the base of the stem: firm tissue is a good sign, while dark, wet, sunken tissue suggests the decay has moved upward.
Good to know
Protect your hands before you lift or tilt the plant. Wear thick leather gloves, or wrap the body in a folded newspaper or cardboard sling. Thin fabric gloves do not stop spines. Add eye protection for tall plants or when working at face height.
What growers commonly try
None of this is certain to work, but these are the usual steps when some healthy tissue remains.
- Remove the wet soil. Crumble it away gently and discard it.
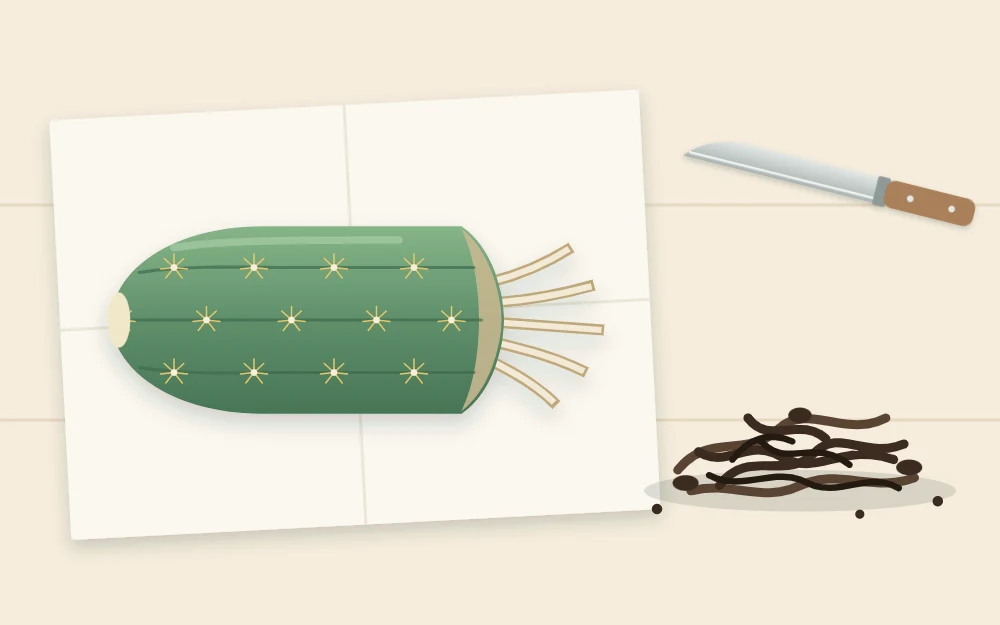
- Cut away soft, dark roots. Use a clean, sharp blade and trim back to firm, pale root. Wipe the blade clean between cuts.
- Cut back to clean tissue if the base is affected. Slice a little at a time until the cut surface is evenly colored, with no brown or dark streaks.
- Let the plant dry. Rest it in bright shade with moving air until every cut is dry and callused. Trimmed roots may need only a few days, while a large cut on the stem can take a couple of weeks or longer.
- Repot in dry, gritty mix. Use a clean pot with a drainage hole, only a little wider than what is left of the roots. The steps are in the guide on how to repot a cactus.
- Wait before watering. Give it roughly a week or more in bright, indirect light, then water lightly and let the mix dry fully again.
Honest limits
Some plants cannot be saved. If each fresh cut still shows discolored tissue and the staining runs well up the inside of the stem, the plant may not recover, and it is fair to stop.
With a columnar cactus there is sometimes one more option: a firm, healthy top section can be cut off well above the damage, left to dry until the cut has callused, and then set on dry gritty mix to root. It takes time and does not always succeed.
Preventing rot next time
- Check that the mix is dry to the bottom of the pot before you water.
- Use a gritty, fast-draining mix and a pot with a drainage hole.
- Empty the saucer or outer pot after watering.
- Choose a pot only slightly larger than the root ball.
- Give the brightest light you can, and water far less in cool, dim months.
Forest cacti such as Christmas cactus like more moisture than desert kinds, but they rot in soggy mix too, so the same drainage rules apply.
Frequently asked questions
Can a cactus recover from root rot?
Sometimes. If the stem is still firm and only some roots are affected, trimming the dead roots, letting the cuts dry and repotting into dry gritty mix gives the plant a chance. When discolored tissue runs well up the inside of the stem, recovery becomes unlikely, and no method makes it certain.
How long should a trimmed cactus dry before repotting?
Long enough for every cut surface to feel dry and form a firm callus. Small root trims may be ready within a few days, while a wide cut across the stem can need a couple of weeks or longer. Keep the plant in bright shade with moving air while it dries, and out of direct sun.
Does a soft cactus base mean the roots have rotted?
Not necessarily. Rot linked to wet soil is one possibility, but cold damage, scorch and wounds can also soften tissue, and firm brown corking at the base of an older plant is normal. Check how wet the mix is at depth, then slide the plant out and look at the roots before deciding.